How to Change Your Default DNS to Google DNS for Fast Internet Speeds
DNS (Domain Name system) is a set of numbers that is assigned by your respective ISPs to connect to the World Wide Web. DNS first converts your domain name into an IP address and then connects to your ISP to loads pages over the web. Basically, it translates more readily memorized domain names to the numerical IP addresses needed for the purpose of locating and identifying computer services and devices with the underlying network protocols. By providing a worldwide, distributed directory service, the Domain Name System is an essential component of the functionality of the Internet.How to change your default DNS to Google DNSWe are going to teach you different methods through which you can change your default ISP provided by DNS to the Google DNS.This will provide you the maximum bandwidth limit and give you better internet speed. If you dont like the new settings, you can always switch back to the default DNS settings of your ISP.
Steps To Manually Setup Google DNS In Windows PC
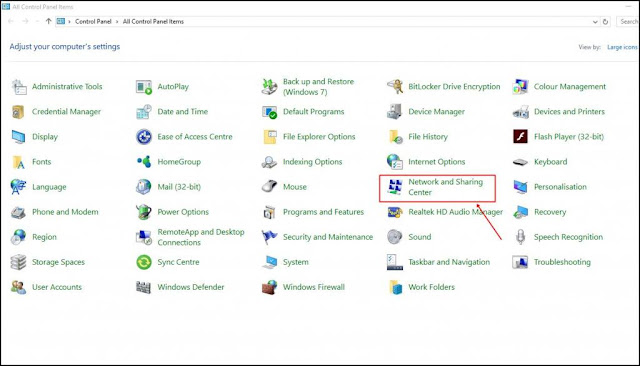
Step 1. First of all, in your windows PC go to the Control Panel and select Network and sharing center.
Step 2. And there click on Change adapter settings.
Step 3. Now there you will see all networks, select the network that you want to configure for Google DNS.
Step 4. Now click on Networking tab and there under This connection uses the following items select the option Internet Protocol Version 4 (TCP/IPv4) and then click on properties.
Step 5. Now choose the radio button Use the following DNS server addresses there and there will be written some default IP, simply clear them. Now there fill the value of google DNS value that is 8.8.8.8 OR 8.8.4.4 and then simply click on “OK” and then restart your network.
That’s it! you are done, You are now surfing the Internet using Google DNS servers. You should observe the speed for a few days and if you are not satisfied you can always revert back to the default ISP provided one by selecting Obtain DNS server address automatically.
Note : For Windows 10, the steps are more or less same.
Steps To Automatically Configure Google DNS In Windows PC Using DNS Jumper
You can also use ready made software to make the DNS changes for you. Using DNS Jumper software allows you the flexibility of choosing different DNS including Google and Open DNS with ease.
Step 1. Download and install DNS Jumper in your windows PC.
Step 2. Once you have installed the tool, just select the DNS server you would like from the drop down menu and set the settings as shown in the screenshot above.
Thank You :) :)
Hope you like this trick
Stay Tuned
Thank You :) :)
Hope you like this trick
Stay Tuned


No comments:
Post a Comment